一、负载均衡介绍
(1)四层负载均衡
所谓四层就是基于IP+端口的负载均衡
四层负载均衡,是指OSI七层模型中的传输层,传输层已经支持TCP/IP的控制,所以只需要对客户端的请求进行TCP/IP协议的包转发就可以实现负载。
(2)七层负载均衡
七层是基于URL等应用层信息的负载均衡
七层负载均衡是在应用层,它可以完成很多应用方面的协议请求
(3)四层和七层的区别对比
二、Nginx负载均衡调度算法
调度算法分为两大类动态算法和静态算法。其中轮询、加权轮询和IP哈希属于静态算法;最少连接和最短响应时间属于动态算法。在实际的 Nginx 等负载均衡器中,轮询是默认算法,而加权轮询、IP哈希和最少连接数则是生产环境中使用频率最高的几种策略。
三、四层负载均衡实验(轮询算法)
模拟开启几个后端服务
[root@localhost ~]# mkdir -p /root/python3/{web8001,web8002,web8003}
[root@localhost ~]cd /root/python3/web8001
[root@localhost web8001] cat > index.html << 'EOF'
<!DOCTYPE html>
<html lang="zh-CN">
<head><meta charset="UTF-8"><title>端口信息</title></head>
<body>
    <h1>1.后端服务</h1>
    <p>指定展示端口:<strong>8001</strong></p>
	<p>系统:<strong>Rocky9</strong></p>
</body>
</html>
EOF
[root@localhost web8001]screen -S web8001   #开启一个虚拟引擎
[root@localhost web8001]python3 -m http.server 8001
#暂时离开但保持程序运行按下键盘上的快捷键 Ctrl + A,松开后再按 D。此时你会回到原来的终端,而服务依然在后台稳稳地跑着。
[root@localhost ~]cd /root/python3/web8002
[root@localhost web8002] cat > index.html << 'EOF'
<!DOCTYPE html>
<html lang="zh-CN">
<head><meta charset="UTF-8"><title>端口信息</title></head>
<body>
<h1>2.后端服务</h1>
<p>指定展示端口:<strong>8002</strong></p>
<p>系统:<strong>Rocky9</strong></p>
</body>
</html>
EOF
[root@localhost web8002]screen -S web8002 #开启一个虚拟引擎
[root@localhost web8002]python3 -m http.server 8002
#暂时离开但保持程序运行按下键盘上的快捷键 Ctrl + A,松开后再按 D。此时你会回到原来的终端,而服务依然在后台稳稳地跑着。[root@localhost ~]cd /root/python3/web8003
[root@localhost web8002] cat > index.html << 'EOF'
<!DOCTYPE html>
<html lang="zh-CN">
<head><meta charset="UTF-8"><title>端口信息</title></head>
<body>
<h1>3.后端服务</h1>
<p>指定展示端口:<strong>8003</strong></p>
<p>系统:<strong>Rocky9</strong></p>
</body>
</html>
EOF
[root@localhost web8003]screen -S web8003 #开启一个虚拟引擎
[root@localhost web8003]python3 -m http.server 8003
#暂时离开但保持程序运行按下键盘上的快捷键 Ctrl + A,松开后再按 D。此时你会回到原来的终端,而服务依然在后台稳稳地跑着。查看这三个端口是否正常存在
[root@localhost web8003]# ss -tlnp | grep 800
LISTEN 0      5                      0.0.0.0:8001       0.0.0.0:*    users:(("python3",pid=40955,fd=3))
LISTEN 0      5                      0.0.0.0:8002       0.0.0.0:*    users:(("python3",pid=40978,fd=3))
LISTEN 0      5                      0.0.0.0:8003       0.0.0.0:*    users:(("python3",pid=40602,fd=3))
编辑相关的配置文件 。红方框部分即位新添加的
[root@localhost ~]# vi /etc/nginx/conf.d/default.conf
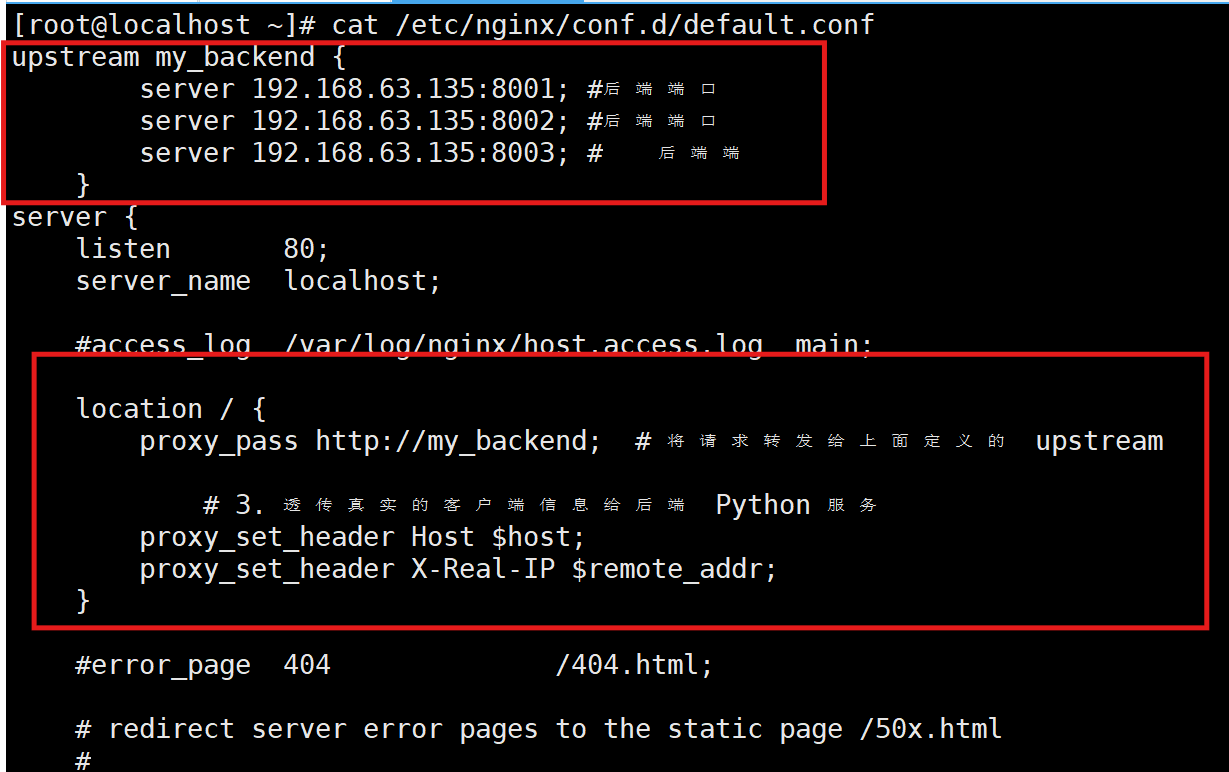
upstream my_backend {
        server 192.168.63.135:8001; #后端端口
        server 192.168.63.135:8002; #后端端口
	server 192.168.63.135:8003; #后端端口
    }
server {
    listen       80;
    server_name  localhost;

    #access_log  /var/log/nginx/host.access.log  main;

    location / {
        proxy_pass http://my_backend;  # 将请求转发给上面定义的 upstream

            # 3. 透传真实的客户端信息给后端 Python 服务
        proxy_set_header Host $host;
        proxy_set_header X-Real-IP $remote_addr;
    }

    #error_page  404              /404.html;

    # redirect server error pages to the static page /50x.html
    #
    error_page   500 502 503 504  /50x.html;
    location = /50x.html {
        root   /usr/share/nginx/html;
    }

    # proxy the PHP scripts to Apache listening on 127.0.0.1:80
    #
    #location ~ \.php$ {
    #    proxy_pass   http://127.0.0.1;
    #}

    # pass the PHP scripts to FastCGI server listening on 127.0.0.1:9000
    #
    #location ~ \.php$ {
    #    root           html;
    #    fastcgi_pass   127.0.0.1:9000;
    #    fastcgi_index  index.php;
    #    fastcgi_param  SCRIPT_FILENAME  /scripts$fastcgi_script_name;
    #    include        fastcgi_params;
    #}

    # deny access to .htaccess files, if Apache's document root
    # concurs with nginx's one
    #
    #location ~ /\.ht {
    #    deny  all;
    #}
}
重启nginx
[root@localhost ~]# nginx -t   #检查语法
nginx: the configuration file /etc/nginx/nginx.conf syntax is ok
nginx: configuration file /etc/nginx/nginx.conf test is successful
[root@localhost ~]# systemctl reload nginx #平滑升级
访问链接查看内容


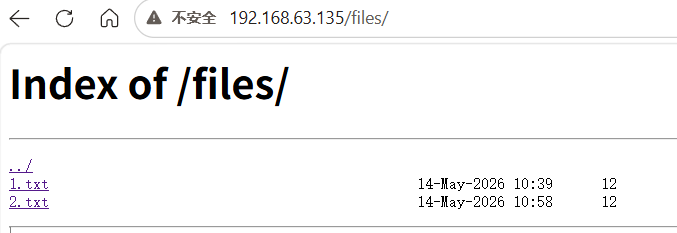
扩展知识(通过nginx获取服务器中的文件):
[root@localhost ~]#vi /etc/nginx/conf.d/default.conflocation /files/ {
alias /data/jitao/html/;
autoindex on;
autoindex_exact_size off;
autoindex_localtime on;
}
# 1. 【大门】
# 当用户在浏览器输入 http://IP/files/ 开头时,Nginx 就会进入这里处理
location /files/ {

    # 2. 【地图映射】(最关键!)
    # alias 意思是“别名”或“替换”。
    # 它的作用是:把 URL 里的 /files/ 替换成服务器硬盘上的这个真实路径。
    #
    # ❗️注意:这里末尾的 / 绝对不能少!
    # 如果少了这个 /,Nginx 会把 /files/txt 拼成 /data/jitao/htmltxt (连在一起了),导致找不到文件。
    alias /data/jitao/html/;

    # 3. 【展示目录】
    # 当用户只访问文件夹(不访问具体文件)时,是否允许列出里面的文件清单?
    # on 表示允许。这样你就能看到 txt 这个文件名了。
    autoindex on;

    # 4. 【人性化显示大小】
    # off 表示:不要显示精确字节数,而是显示 1KB, 2MB 这种易读的格式。
    autoindex_exact_size off;

    # 5. 【人性化显示时间】
    # on 表示:显示服务器的本地时间,而不是 GMT (格林威治) 时间,方便你对时间。
    autoindex_localtime on;
}
创建目录
[root@localhost ~]#mkdir -p /data/jitao/html && cd /data/jitao/html
[root@localhost ~]#echo 'hello' >> 1.txt
[root@localhost ~]#echo 'world' >> 2.txt
[root@localhost ~]#chmod 755 /data/jitao/html
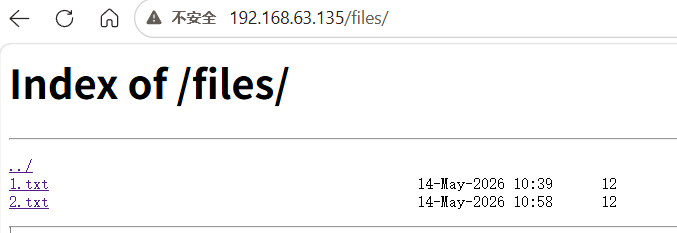
最后使用浏览器访问http://ip/files,就能够得到这两个文件,可以任意下载。